MG support
Home 5 MGHome Cellular

Find Solutions

Set Up & Installation

Follow these steps to install the MGHome Cellular:

  1. Make sure the AC power adaptor is securely connected to the back of the device.
  2. Plug the power adaptor into a direct wall socket that is not connected to a light switch. Avoid any power strips or power cords.
  3. After power is supplied, press the power button once to power on the device. The red power button is located on the back of the device by the power cord.  
  4. The info button will flash amber until it turns solid green.
  5. When the device connects to the network, it will verbally state, “Device ready.”
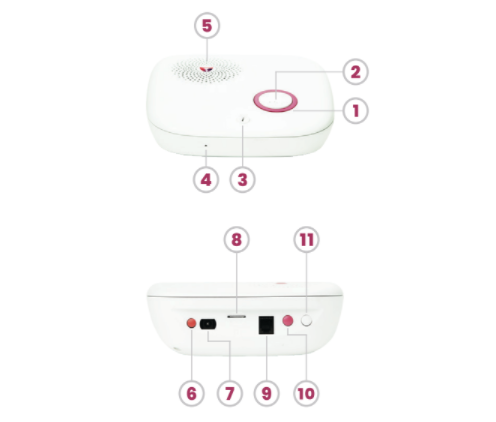
Parts Identification
  1. Berry backlight
  2. Help Button
  3. Info Button
  4. Microphone
  5. Speaker
  6. Red Power Button
  7. AC Power Connector
  8. Micro SIM Card Slot
  9. Phone Jack
  10. Berry Volume Button
  11. White Pairing Button

Info Button

  • Solid Green – The device is plugged into a power source.
  • Blinking Green – The device is running on the backup battery.
  • Blinking Red – The backup battery is getting low.
  • Blinking Amber – The device is working to find cellular connectivity.

Power Button

  •  The red power button is located on the back of the device.

Help Button

  • The Help Button will be dimly lit berry when the device is powered on.
  • Upon button press, the help button ring lights up bright until the cancellation window has passed.
  • Once the connection starts to the monitoring center, the help button ring light stays solid bight berry until the call is over.
Button Pairing

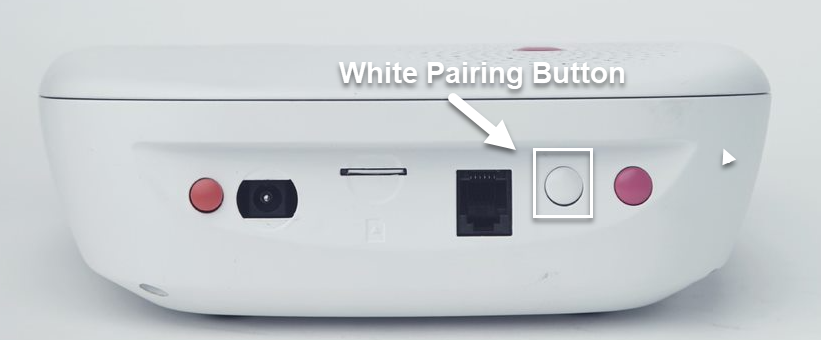
    Follow these steps to pair a button with your MGHome Cellular:

    1. Press the white pairing button on the back of the device to initiate the verbal cue “Entering Pairing mode”.
    2. Press the button on the neck and/or wrist pendant to connect to the device for 3 seconds.
    3. When the pairing has been completed, the device will state “Pairing Completed. Exiting learning mode”.
    4. The button is now paired. It is recommended to test the newly paired button.

    Fall Detection

    Watch this video to learn everything you need to know about Fall Detection with your device!

    Fall Detection can provide peace of mind knowing that our monitoring center will receive a signal to send help without the push of a button for additional $10.00 monthly.

    • Fall Detection pendants contain tiny sensors that can detect changes in motion, as well as changes in the height of the pendant. If a fall is detected, the device will send an alarm to the monitoring center to begin the normal call process.

    • Fall Detection works best when worn around the neck and outside of clothing.

    • Fall Detection does not detect 100% of falls. If you are able, press your fall detection button in the event of an emergency. You may experience false alarms from time to time. Please advise the operator it was a false alarm.

      • This is a physical button.

      • The fall detection pendant should be worn around the neck and on the outside of the clothes.

      • Has a range of 500 ft from the mobile device.

      • Battery life up to three years.

      Testing Your Device & Pendants

      It is recommended to test your device and pendants monthly to ensure they are working properly.

      Follow the steps below to test your device and pendants:

      1. To get started, grab any/all buttons that need to be tested and be sure to be in range of the base device.
      2. Press the transmitter button or help button on the device for at least 3 seconds. The device will announce “Initiating Help“.
      3. There will be a one-second pause and then a series of 10 beeps. During this time the alarm can be canceled by a 5-second press on the base device or the transmitter button. If the alarm is canceled, the unit will state “Call Cancelled”.
      4. The device will state “Call in Progress” and then “Call Connected“.
      5. The device will connect to Stella, the automated voice assistant.
      6. If a live operator responds through the device, inform the operator that “this is just a test.
      7. Important!  Be sure to wait at least 60 seconds between tests.
      Best Practices

        Button To Base Range
        The base unit can detect a button press within a 1,400 ft range from the base device. Help can still be sent if you aren’t able to communicate with the monitoring center and you are within 1,400 ft of the base device.

        Backup Battery
        In the event of a power outage, the backup battery will run for 32 hours.  Once power is restored, the backup battery will recharge on its own.

        Monthly Testing
        It is recommended to test your base device, as well as any/all buttons, monthly to ensure they are working properly. Simply press the button and when you’re connected to the monitoring center, state that you are testing your device/button and no help is needed.

        FAQs

        How do I power on and power off my device?

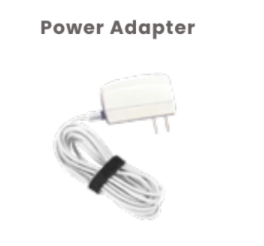
        Powering on the MGHome Cellular:
        Plug the power adaptor into a direct wall socket that is not connected to a light switch. Press the red power button on the back of the device located next to the power cord. The info light will light up solid green indicating it is connected to a power source and will verbally state, “Device ready.”

        Powering off the MGHome Cellular:
        Press the red power button on the back of the device located next to the power cord. The berry colored LED light on the front of the device will go out indicating the device is powered off.

        Can I move this device to a new location?
        Yes, this device can be moved to a new location anywhere in the United States where there is a 4G cell network available. The new address will need to be provided (temporary or permanent) by calling the Customer Care department or by logging into the MyGuardian Member Portal. The device should be tested at the new address to ensure it is working properly.

        Should extension cords and surge protectors be avoided?
        Yes, extension cords and surge protectors can limit the amount of power the device receives resulting in the device not working properly. The device’s power cord needs to be plugged directly into a wall outlet that does not operate on a light switch.

        What material is used to make the neck button?
        The neck button is made of TPU (Thermoplastic polyurethane plastic) and has a nylon cord/lanyard attached.

        What material is used to make the wrist button?
        The wrist button is made of TPU (Thermoplastic polyurethane plastic) and has a silicone, latex free band.

        Are the buttons water-resistant?
        The wearable neck and wrist buttons are waterproof and can be worn in the shower and submerged underwater. The buttons should be towel dried after contact with water. All of our devices are IP67 Certified.

        How long does the battery in the button (neck and wrist) last?
        The buttons have a battery life of up to 5 years. A red LED light will flash after a button press if the button has a low battery. If you experience a low battery light indicator, please call our Customer Care department. We will be glad to replace it for you at no cost.

        How long does the battery in the Fall Detection button last?
        The Fall Detection button has a battery life of up to 3 years. A red LED light will flash when the button has a low battery. If you experience a low battery light indicator, please call our Customer Care department. We will be glad to replace it for you at no cost.

        Can metal roofing/siding, trees, airports and other environmental factors have any effect on the device being able to connect?
        Yes, metal roofs/siding, concrete buildings (such as a basement), and environmental factors like wooded areas can have an impact on signal strength for a device which affects the device’s ability to connect.