

MGClassic
Find Solutions
Getting Started
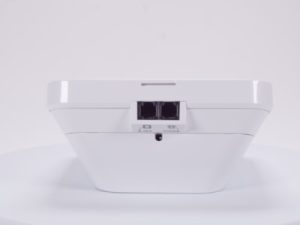
Parts
Your base unit comes with:
- a UL bracket
- a power cord
- backup battery
- wearable buttons
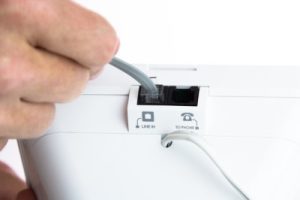
- one phone cord.
Light Indicators and Base Buttons
Power Light (Green Power Symbol)
- Solid green – Unit is Connected to a Power Source.
- Blinking green – Unit is running on backup battery.
- Off – No power.
Communication Light (WiFi/Connection Symbol)
- Blinking green – Unit is trying to stablish a connection. (You will need to wait until the light is steady to complete a test or reach the monitoring center.)
- Orange – Active conversation.
- Red – No connection/Improperly connected.
Trouble Light (Caution Symbol)
- Solid red – Malfunctioning button.
- Flashing red – Low battery on button.
Emergency Call Light
- ON (steady blue)- Normal device behavior.
- Red- Button pressed
- Pairing Mode: Blue LED
- Circular Run/Flashing – Pairing Mode initiated
- Blinks Three Times – Pairing Succeeded Reset Button
- The Reset Button is used to complete a soft reset of the base station.
- Press and hold the reset button to turn the blue LED light off.
Installation & Set Up
Pairing Buttons
How to pair a button with the MGClassic:
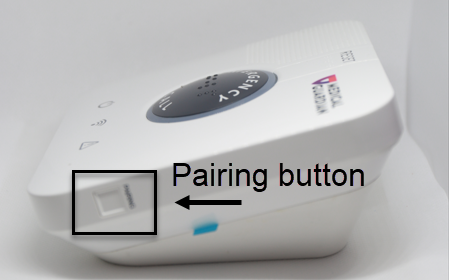
- Gather any/all buttons to be paired.
- Press and hold the pairing button on the right-hand side of the base station until you hear two sets of beeps and then let go.
- The ring light around the Emergency Call button on will begin to illuminate blue.
- Once the ring light has illuminated, please step back at least five (5) feet from the base station with your new button in-hand. Then, firmly press and hold your button for six (6) seconds, and release.
- When your wearable button has successfully paired, the base station will announce, “Pairing successful!”
- Now that pairing has completed successfully, please make a test call from your wearable help button.