
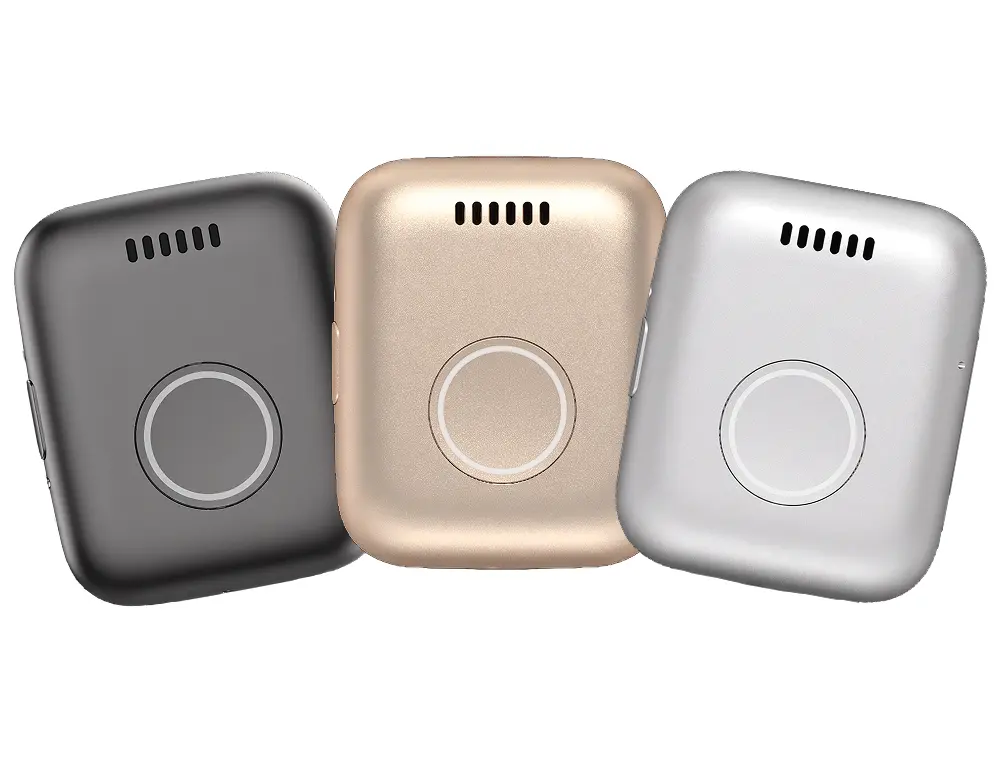
Guardian Flex
Find Solutions
Getting Started
Quick Start Guide
- Assemble the charging cradle and plug it into a wall outlet.
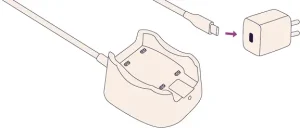
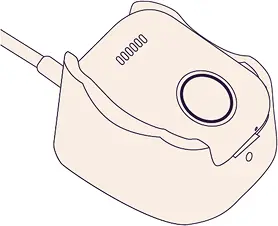
- Place the device in the cradle. It will power on automatically and you will hear “Charging”.
- Take the device out of the cradle and press the side info button once to confirm signal and battery level. If cellular signal is poor contact our Member Support team.
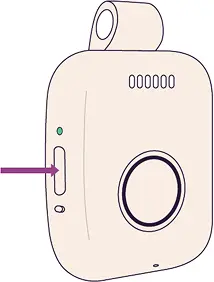
- Test your device by pressing and holding the SOS button for 3 seconds, then release it. When connected, let the operator know you are performing a test.
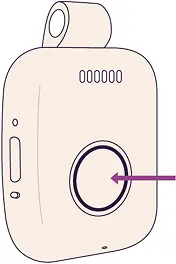
- Place the device back in the cradle and allow it to charge completely. The status light on the side of the device will turn solid green when fully charged.
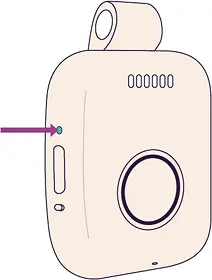
- Once fully charged, your device is ready to wear and use.
Get to Know Your Device
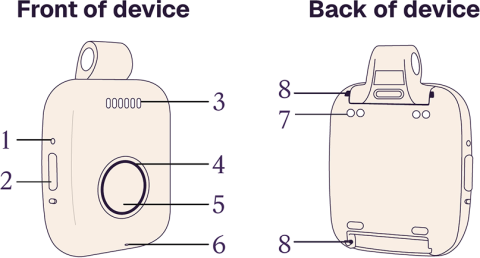
- Status light
- Power/info button
- Speaker
- Ring light
- SOS button
- Microphone
- Charging pins
- Snap Adapter
- Charging cradle
- USB-C cable
- Charging brick
- Charging indicator light
Assemble Your Charging Cradle
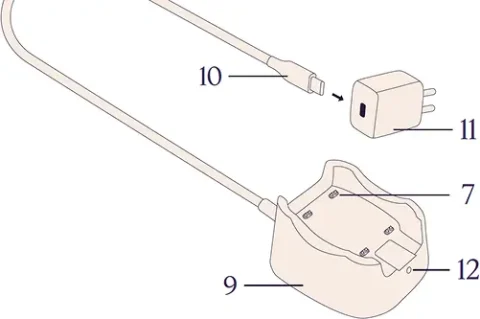
- Plug the USB-C cable (10) into the charging brick (11), then plug the brick into a wall outlet.
- Place the device on the charging cradle. Make sure the charging pins (7) on the back of the device line up with the pins (7) on the cradle.
- When the device is placed correctly, it will say “Charging.” The ring light will blink white for a second. The status light will blink a color that shows the battery level. (See the status light chart for more information.)
- When the status light stays solid green, the device is fully charged. The light will stay on until you remove the device from the charger.
Important Tips
- Before your first-use, fully charge the device.
- Charge your device every day to keep it ready for use.
- Full charges can take up to 2 hours.
- Test your device once a month to ensure it is working properly.
- Your device is water-resistant and can be worn in the shower. Do not fully submerge it for more than 30 minutes.
- Battery life can last up to 5 days.
- Battery life can vary based on user settings, the environment (like cellular network strength), and how the device is used.
Get to Know Your Status Light
When your device is turning on, the lights will cycle from red ? orange ? green
What each light color means:
- Green light (battery)
- Slow blinks while charging: Battery is above 70%.
- Solid on charger: Device is fully charged.
- Orange light (battery)
- Slow blinks while charging: Battery is 30–70%.
- Red light (low battery)
- Slow blinking while charging: Battery is under 30%.
- Blinking every minute (while out of the cradle): Battery is very low, please charge soon. Voice guidance warnings will be announced at 30% and then at 20%.
Get to Know Your Ring Light
What each light color means:
- Solid red
- SOS alarm or fall detected.
- Blinking orange
- No cellular network signal. If this issue persists, please contact Member Support.
- White
- Slow blinks: Connecting to the Monitoring Center.
- Solid: Connected to an active call.
Using Your SOS Button
Press and hold for 3 seconds to:
- Start an SOS emergency call.
- Cancel an SOS call or fall alert.*
- Power on the device if it is currently off.
*Fall detection only works if it is part of your service plan. It may not detect every fall and may sometimes send a false alert. If you are able, always press the SOS button for help.
Using Your Power/Info Button
What each action does:
- Press and hold for 3 seconds
- Announces the current time.
- 1 quick press
- Announces battery level and signal strength.
- Example: “Cellular signal good. Battery level medium.”
- 2 quick presses
- Announces step count.
- 4 quick presses
- Turns the device off.
Test Your Device
- Press and hold the SOS button on your device for 3 seconds.
- The device will vibrate, and the ring light will illuminate.
- You will hear, “SOS activated. Calling for help. Press and hold the button to cancel.”
- Once your device has connected, it will say, “Call connected.”
- Please state you are okay and just testing.
Attach Your Snap Adapter (Lanyard or Wristband)
- Hold the back of the device facing you. The connector button on the snap adapter should also be facing you.
- Line the connector pins up with the guard rails on the back of your device.
- Press and hold the connector button.
- While holding the button, slide the snap adapter between the guard rails.
- When the snap adapter is fully in place, release the button.
- You will hear a click when it is secure.
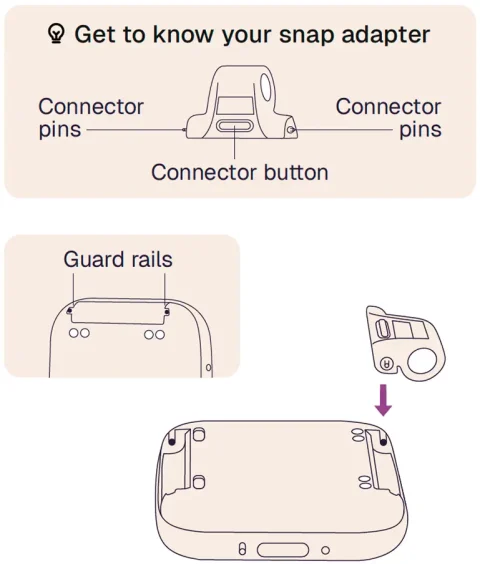
NOTE: These steps apply to both the lanyard and wristband snap adapters. For the wristband, simply repeat the same steps on both sides
Remove Your Snap Adapter (Lanyard or Wristband)
- Hold the back of the device facing you. The connector button on the snap adapter should also be facing you.
- Press and hold the connector button.
- While holding the button, gently pull the snap adapter away from the device.
- The snap adapter will slide out from the device.
NOTE: These steps apply to both the lanyard and wristband snap adapters. For the wristband, simply repeat the same steps on both sides
Find Your Device (If Lost)
- The device’s location will show on the map in the portal or app.
- You can use the portal or app to find your device by clicking “Ring my Device.”
- The device will say “I’m over here” very loudly for 10 seconds.